

Owning a Class A motorhome is one of the most rewarding experiences in the RV world. It’s also one of the most technically demanding. You’re not managing a simple towable — you’re managing a vehicle with a diesel or gas engine, transmission, hydraulic leveling system, slide-out mechanisms, full residential appliances, electrical systems that rival a small house, and a roof the size of a shipping container that needs regular attention.
- The Engine: The Heart That Can’t Be Ignored
- The Roof: Your Biggest Enemy Is Also Overhead
- The Tires: The Most Dangerous Neglect
- Hydraulics and Leveling
- Electrical Systems: The Complexity That Bites
- Living Systems: The House Half of the Machine
- The Class A Owner’s Quick Reference Maintenance Schedule
- The Honest Bottom Line
Most Class A owners understand this going in. What surprises them is the specific, quiet ways the rig communicates its needs — the sounds that mean something, the patterns that indicate a developing problem, and the maintenance items that look optional on the schedule but are genuinely critical to the machine’s longevity.
Replacing a diesel engine on a Class A RV can cost over $30,000. Transmission work runs $5,000–$15,000. Water damage to the structure of a large motorhome can reach $20,000+. A refrigerator repair runs $2,500–$14,500. These are the numbers that turn enthusiastic Class A owners into cautionary tales.
This guide covers the 15 maintenance items that experienced Class A owners know by heart — and that newer owners almost universally discover the hard way. For each one: what it is, why it matters, and specifically what to do.
The Engine: The Heart That Can’t Be Ignored
1. Oil Changes — The Interval That Saves the Engine
This is the maintenance item with the most expensive consequence of neglect. A Class A motorhome’s diesel or gas engine operates under sustained heavy load — pushing a 30,000–40,000 lb vehicle down the highway is not the same as a car engine cruising at light throttle. That load degrades engine oil faster, and the consequences of running degraded oil are severe.
The problem most owners create: Applying automotive oil change intervals to motorhome use. A car that drives 5,000 miles in six months with mostly light highway use is different from a Class A that drives 5,000 miles in three weeks of full camping season, much of it at high load on mountain grades.
What to actually do: For gas-powered Class A motorhomes on a Chevy or Ford chassis: oil changes every 3,000–5,000 miles or annually, whichever comes first. Consult your specific chassis manufacturer’s recommendation — not the general RV community consensus.
For diesel pushers: the Cummins, Detroit Diesel, or Cat engines that power most premium Class A coaches have their own specific oil type and interval requirements. Extended drain intervals on quality synthetic oil are possible — but require analysis (Blackstone Labs offers oil sampling that tells you exactly when your specific engine actually needs a change based on what’s in the oil). Never exceed the manufacturer’s stated maximum interval.
Always change together: Oil filter, fuel filter, air filter, and coolant filter (if equipped) at every oil service. The filters protecting your engine are nearly as important as the oil itself.
2. Transmission Fluid — The One That Gets Skipped
Ask ten Class A owners when they last changed their transmission fluid and seven of them will look uncertain. This is the maintenance item that falls between the cracks because the transmission doesn’t announce its needs until it’s failing.
Transmission slippage, difficulty shifting, overheating on grades, and eventual failure are the consequences of neglected fluid — and transmission repairs on a Class A run $5,000–$15,000 depending on the unit and extent of damage.
What to do: Change transmission fluid and filter every 30,000–50,000 miles or every 2–3 years of regular use. Use the exact fluid specification from your transmission manufacturer — Allison, Ford TorqShift, or whatever your specific unit requires. Wrong fluid is worse than no change.
Check fluid level and color monthly during use season. Dark, burnt-smelling fluid means change it now — not at the next scheduled service.
3. Coolant System — The Overheating You Don’t See Coming
A Class A motorhome’s cooling system is working significantly harder than any passenger vehicle’s — managing heat from a larger engine at sustained high loads, often in summer temperatures, often on grades that require prolonged effort.
Coolant degrades over time — its corrosion inhibitors break down, its pH drops, and it begins actively corroding the aluminum and iron components it’s meant to protect. The thermostat that controls operating temperature is a moving part subject to failure — and a thermostat that sticks closed turns a routine mountain grade into a roadside breakdown.
What to do:
- Flush and replace coolant every 2 years or per manufacturer specification
- Check coolant level every trip — a gradual decline indicates a slow leak that needs addressing
- Replace the thermostat proactively at 50,000–75,000 miles — a $30 part that prevents overheating
- Inspect radiator and intercooler for bugs, debris, and fin damage at the start of every season — blocked cooling fins reduce cooling capacity significantly
4. The Exhaust Brake — The Feature Nobody Maintains
Class A diesel pushers have an exhaust brake or engine brake system that helps control descent speed on grades — reducing wear on the service brakes during the sustained downhill operation that Class A coaches regularly encounter.
Most owners use it. Few owners know it requires periodic inspection and that the valves involved can wear or carbon up over time, reducing effectiveness precisely when you need it most — loaded, on a steep grade, in the summer heat.
What to do: Include exhaust brake function in your annual mechanic inspection. If the system feels less effective than it once did, describe it specifically to a diesel technician — reduced effectiveness is a diagnostic symptom, not just normal aging.
The Roof: Your Biggest Enemy Is Also Overhead
5. Roof Inspection and Resealing — Non-Negotiable
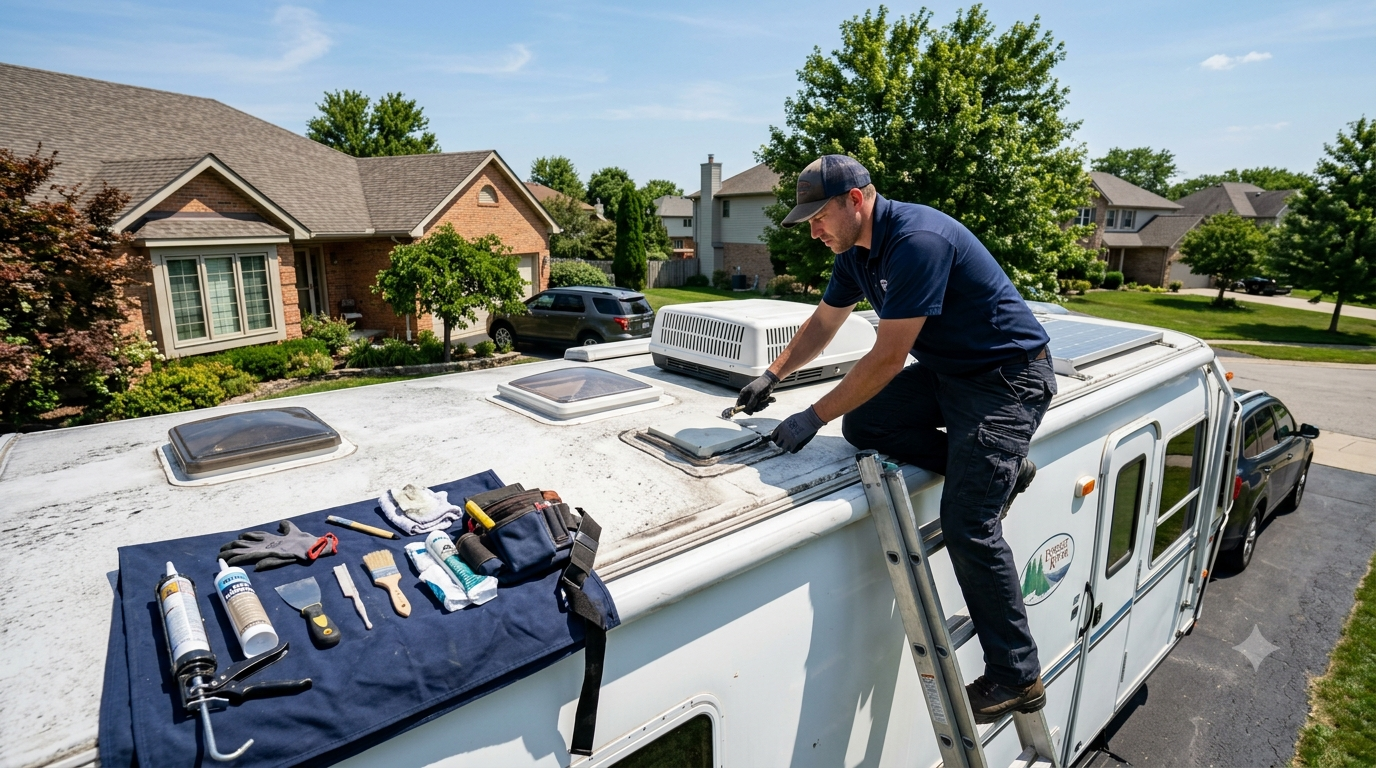
A Class A motorhome roof is typically 100–300 square feet of EPDM rubber, TPO, or fiberglass — depending on the manufacturer and model year. Every penetration point through that roof (air conditioners, vents, skylights, antennas, solar panels) is sealed with lap sealant that degrades in sunlight over time.
The consequence of roof seal failure on a Class A is worse than on a smaller trailer — simply because there’s more of it, more complex structure to damage, and more expensive interior to restore. Full ceiling panels, cabinetry, and slide-out structures all carry the same vulnerability to water intrusion as a smaller rig, just at higher repair cost.
What to do: Walk the entire roof — carefully, knowing the weight limits of your specific roof material — twice a year. Inspect every seal around every penetration point. Look for cracking, separation, chalking, or lifted edges. When you find any of these, clean the area and reseal with Dicor self-leveling lap sealant.
Have the roof professionally inspected annually at a service center that can assess areas you can’t safely reach and identify developing issues before they penetrate.
Also clean the EPDM rubber roof with a dedicated EPDM cleaner (not petroleum-based products, which degrade rubber) and apply an EPDM conditioner or protectant annually. This extends roof material life and reduces UV degradation significantly.
6. Slide-Out Seals and Mechanisms — Maintain What You Sleep Inside
A Class A motorhome with multiple slide-outs has multiple slide-out seals — and those seals are critical both for weather protection and structural integrity. Failure of the wiper seals or the D-seal that runs along the perimeter allows water intrusion every time it rains.
What to do:
- Lubricate slide-out rails and gears every 6 months with slide-out specific lubricant
- Inspect all slide-out seals for cracks, tears, or compression loss annually
- Treat rubber slide seals with a rubber conditioner (303 Aerospace Protectant is widely used) to prevent drying and cracking
- Check slide-out alignment — visible gaps between the slide and the main wall seal indicate misalignment that should be corrected professionally
The Tires: The Most Dangerous Neglect
7. Tire Age and Pressure — The Two Numbers That Matter Most
Class A motorhome tires are doing something that car tires never do: carrying 20,000–40,000 lbs at highway speed, often in the summer heat, after months of stationary storage. This combination — heavy load, temperature extremes, and UV exposure during storage — makes motorhome tires age faster and fail more unpredictably than tires on any other consumer vehicle.
A tire blowout on a Class A at highway speed is not just a roadside inconvenience. It can damage the wheel well, undercarriage, slide mechanisms, and in serious cases compromise vehicle control. The consequences scale with the size and speed of the vehicle.
What to do: Check tire pressure cold before every trip — every single one. Class A motorhome tires typically run 95–115 PSI and must be checked with a quality gauge (not the cheap pencil types, which are inaccurate at high pressures).
Install a TPMS system. For a Class A, this is not optional — it’s a safety system that gives you real-time pressure and temperature data from all six or more tires while driving. TireTraker, PressurePro, and EEZTire all make systems rated for the pressure range of motorhome tires.
Replace tires at 5–7 years from manufacture date regardless of appearance or tread depth. Check the DOT code on the sidewall — the last four digits indicate week and year of manufacture. A 2019 tire looks fine in 2026. It may not be.
Get a wheel-by-wheel weight check at a certified weigh station — knowing your actual per-axle and per-wheel weight tells you whether your tires are appropriate for your actual loaded weight, which is the most important factor in preventing blowouts.
Hydraulics and Leveling
8. Hydraulic Leveling System — Maintain What Parks You
Most Class A motorhomes use a hydraulic leveling system — the mechanism that deploys and retracts the stabilizing jacks that level the coach at camp. This is the system that most owners notice only when it fails — and failure of a hydraulic leveling jack in the down position means the coach cannot legally move until it’s repaired.
The common failure: Hydraulic fluid that hasn’t been checked or changed allows air into the system, causing soft or unresponsive jacks. Contaminated fluid degrades seals, leading to leaks that progress from slow to significant.
What to do: Check hydraulic fluid level every 6 months using the correct fluid specification for your specific system (Lippert, HWH, and Atwood all use different specifications — use only the correct type).
Inspect all visible hydraulic lines for seeping, cracking, or rubbing damage annually. A hydraulic line failure under the coach is a mess at best and a safety issue at worst.
Cycle the jacks monthly during the off-season — run them out and back in — to keep seals lubricated and prevent them from seizing in the retracted position.
Electrical Systems: The Complexity That Bites
9. Surge Protection — The $300 Decision That Protects $15,000
Campground power quality varies enormously. Low voltage, high voltage, miswired pedestals, and lightning-induced surges are all real hazards that the electrical system of a Class A motorhome — with its inverter, converter, multiple appliances, and sophisticated electronics — is not inherently protected against.
A single significant power event can damage the inverter/charger ($2,000–$4,000 to replace), the refrigerator ($2,500–$14,500), and the control boards on HVAC systems ($500–$1,500 each) simultaneously.
What to do: Install a Progressive Industries or Southwire SurgeGuard EMS (Electrical Management System) — not a basic surge protector, but a full EMS that monitors voltage, frequency, open ground, and open neutral conditions, and disconnects power when parameters are out of safe range. Cost: $300–$450 for a portable unit; $500–$700 for a hardwired unit. The investment pays for itself the first time it prevents a single appliance failure.
Never plug in without it.
10. Battery Bank — The Foundation of Everything
A Class A motorhome’s house battery bank powers everything when shore power isn’t connected — slides, jacks, lighting, water pump, refrigerator fan, entertainment systems, and in some cases the climate control. A failing battery bank affects every system simultaneously and makes itself known at the worst times.
What to do: Check battery terminal condition monthly during use — corrosion on terminals is the most common cause of intermittent electrical problems and is fixed with a wire brush and dielectric grease in fifteen minutes.
Test battery bank capacity annually with a proper battery load tester — not just a voltage reading, which tells you state of charge rather than capacity.
Consider upgrading to lithium batteries if your bank is due for replacement. The improvement in usable capacity, charge acceptance, and battery life is significant for Class A owners who boondock or dry camp regularly.
11. Generator — Run It or Lose It
A Class A motorhome generator that sits unused for months develops fuel varnish in the carburetor, degraded belts, and in some cases seized internal components that turn a simple generator service into an expensive rebuild.
What to do: Run the generator under load — at least 50% of rated output — for a minimum of two hours every month, even during the offseason. This keeps fuel moving through the system, keeps seals lubricated, and confirms the unit is ready when you need it.
Change the oil and air filter per the generator manufacturer’s schedule — typically every 100–150 hours or annually. The Onan generators common in Class A coaches have specific service schedules and parts; use them.
Living Systems: The House Half of the Machine
12. Air Conditioning — The One That Freezes Up
Class A motorhome air conditioning systems — typically two 15,000 BTU rooftop units — work significantly harder than residential units because they’re managing a space that absorbs solar heat from a full-length roof while operating in ambient temperatures that can exceed 100°F.
The most common failure: Clogged air filters reduce airflow, causing the evaporator coil to drop below freezing and ice up — shutting down cooling entirely. This is a maintenance failure that looks like a mechanical failure.
What to do: Clean or replace the return air filter inside each AC unit every 2–4 weeks during heavy use. Vacuum the interior fins annually. If a unit stops cooling, shut it off for 30 minutes to let ice melt before diagnosing further.
Also inspect the rooftop gaskets on each AC unit annually — the foam gasket that seals the unit to the roof cutout compresses and degrades over time, allowing water infiltration around the unit.
13. Propane System — The Annual Check That Keeps You Safe
A Class A motorhome’s propane system powers the furnace, cooktop, oven, and water heater — sometimes simultaneously, drawing significant volumes of LP gas. The regulator that controls delivery pressure, the flexible hoses at each appliance, and the connections at the tank all require periodic inspection.
What to do: Have the LP system pressure-tested by a certified RV technician annually. This identifies leaks at connections, appliance valves, and flex lines that aren’t detectable by smell alone. Cost: $50–$100 for the test.
Replace the primary LP regulator every 10 years — or sooner if you notice inconsistent appliance performance, which can indicate a failing regulator.
Check the auto-changeover valve (if your coach has dual tanks) annually — these valves fail in ways that leave you thinking a tank is empty when it has propane remaining.
14. Refrigerator — The Appliance With the Biggest Repair Bills
RV refrigerator repair costs range from $2,500 to $14,500 including parts and labor — numbers that genuinely surprise first-time Class A owners who assumed an appliance was a simple item.
The most common cause of RV refrigerator failure is inadequate ventilation — absorption refrigerators require airflow through the exterior vent to release heat from the cooling unit. Blocked vents, debris accumulation, and bird nests in the vent cavity are common causes of premature failure.
What to do: Inspect and clean the exterior refrigerator vents at the start of every season and again mid-season. Remove any debris, check that the baffle allows proper airflow, and confirm no nesting activity.
Check the flue tube annually for blockage or debris.
Ensure the motorhome is parked level when using the refrigerator — absorption units require level operation to function correctly. More than three degrees off level in any direction affects cooling efficiency and over time can damage the cooling unit.
15. Water Heater Anode Rod — The $15 Part That Protects a $600 Appliance
Most Class A motorhome water heaters have a sacrificial anode rod — a magnesium rod that corrodes preferentially to protect the steel tank from rust. When the anode rod is fully consumed, the tank begins to rust from within.
What most owners don’t know: The anode rod needs replacement every 1–2 years. Many owners don’t know it exists until they investigate why the water smells like rotten eggs (a sign of a heavily corroded or consumed rod) or why the water heater failed prematurely.
What to do: Drain and flush the water heater tank annually. While drained, inspect and replace the anode rod if it’s more than 50% consumed — meaning it’s been significantly reduced in diameter. Replacement rods cost $10–$20 and install in minutes with a 1-1/16″ socket. The water heater they protect costs $300–$600 to replace.
The Class A Owner’s Quick Reference Maintenance Schedule
| Task | Frequency |
| Tire pressure check | Every trip |
| Engine fluid levels | Every trip |
| Roof and seal inspection | Every 3–6 months |
| Slide-out lubrication | Every 6 months |
| Engine oil and filter | Every 3,000–5,000 miles / annually |
| Transmission fluid | Every 30,000–50,000 miles |
| Generator service | Every 100–150 hours / annually |
| Wheel bearing inspection | Annually |
| Hydraulic fluid check | Every 6 months |
| LP system pressure test | Annually |
| AC filter cleaning | Every 2–4 weeks (use season) |
| Water heater anode rod | Annually |
| Battery bank test | Annually |
| Tire replacement | 5–7 years from manufacture date |
| Coolant flush | Every 2 years |
The Honest Bottom Line
“The road is there, it will always be there. You just have to decide when to take it.” — Jackson Browne
A Class A motorhome maintained consistently and intelligently will cover 200,000 miles and last twenty or more years. The major failures — engines, transmissions, structural water damage — don’t typically happen to owners who pay attention. They happen to owners who don’t.
The 15 items in this guide aren’t aspirational maintenance goals. They’re the baseline — the minimum that separates a motorhome that rewards its owner from one that teaches expensive lessons.
Do the work. Know your rig. Listen when it tells you something is changing. The open road is genuinely as good as they say — and it’s better from a motorhome that’s been taken care of.