

Here’s something RV service technicians will tell you when they’re being completely honest: about 70% of the repairs they see every season were entirely preventable. Not bad luck. Not unavoidable wear. Preventable — with a little attention, a little knowledge, and a willingness to catch small problems before they become expensive ones.
- Problem #1: The Roof Is Leaking — And You Had No Idea
- Problem #2: The Slide-Out That Won’t Cooperate
- Problem #3: Wheel Bearing Failure
- Problem #4: The Black Tank Sensor Is Lying to You
- Problem #5: Tire Blowout on the Highway
- Problem #6: The Water Pump Runs But Nothing Comes Out
- Problem #7: Battery That Dies Every Weekend
- The Travel Trailer Owner’s Seasonal Maintenance Calendar
- Before You Head Out Next Time
- The Honest Bottom Line
A travel trailer is not a static object. Every mile you pull it rattles fasteners, flexes seals, jolts plumbing connections, and stresses systems that were designed to handle road life but still need regular attention to keep handling it well. The owners who understand that — who listen to what the trailer is telling them and respond before things escalate — are the ones who camp for decades without horror stories.
The owners who don’t are the ones sitting in service bays in May wondering how a $15 roof seal inspection would have saved them $4,000 in water damage repairs.
This guide is built around the real problems that real travel trailer owners face — the ones that show up in forums, in service departments, and in campground conversations. For each one: what’s actually happening, what the warning signs look like, and what you do about it.
Problem #1: The Roof Is Leaking — And You Had No Idea
Why it’s the #1 problem: Water damage is the single most expensive repair in the travel trailer world, and the cruelest part is that it’s almost always invisible until it’s already serious. A small roof seal failure doesn’t announce itself with a puddle on the floor. It seeps slowly behind walls, under flooring, and into structural framing — often for months before the damage becomes visible.
By the time you notice a soft spot in the floor, a stained ceiling panel, or a musty smell that won’t go away, you may be looking at $3,000–$15,000 in structural repair. Water damage repairs in that range require tearing out walls, replacing rotted wood framing, and often addressing mold that’s been growing in hidden cavities.
The warning signs to watch for:
- Soft or spongy floor areas, particularly near slide-outs, corners, or walls
- Ceiling panels that are discolored, stained, or beginning to bubble
- A musty smell inside the trailer that persists after airing out
- Visible gaps, cracking, or separation in lap sealant around vents, skylights, antennas, or roof edges
- Discoloration or staining on exterior walls below windows or along seams
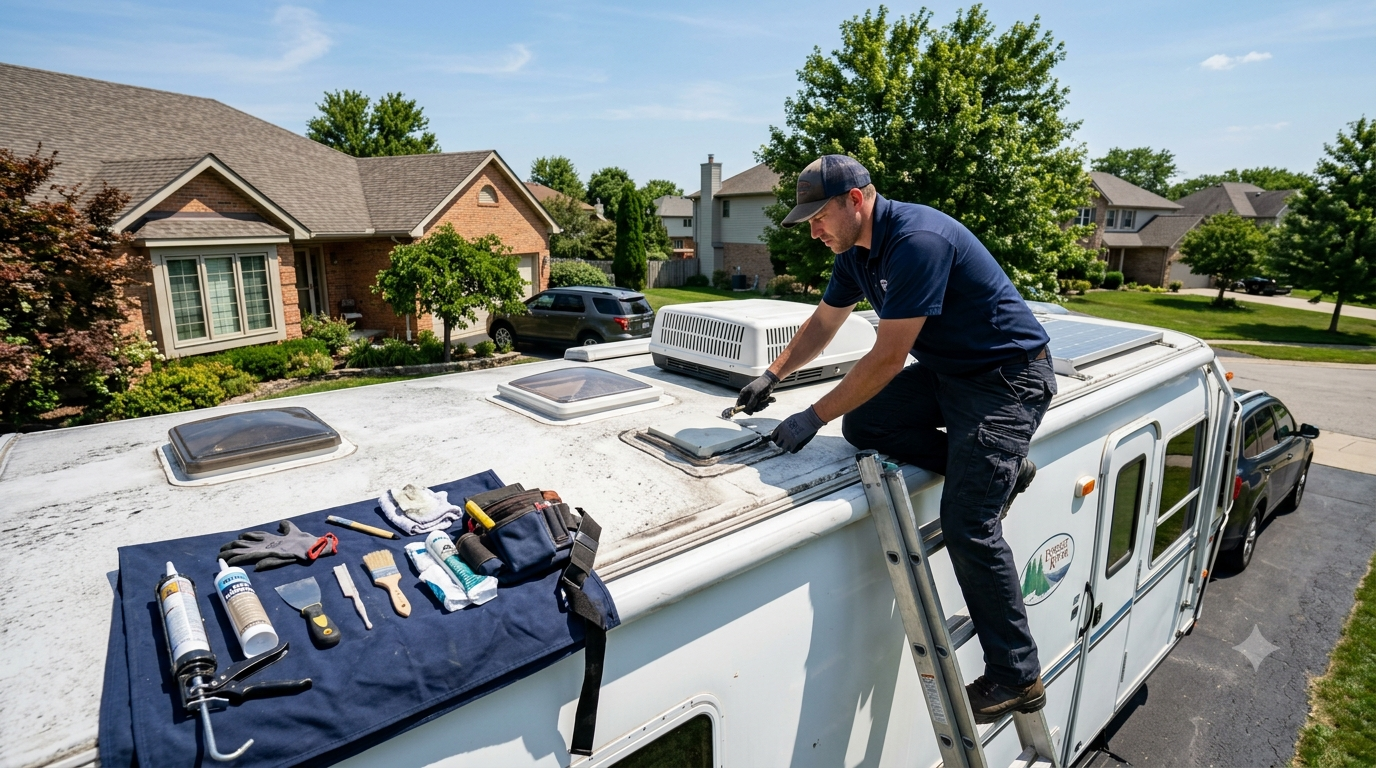
What to do: Get on the roof twice a year — spring and fall minimum — and inspect every inch of lap sealant around every penetration point: vents, air conditioner unit, antennas, roof edges, and skylights. Self-leveling lap sealant cracks with age, UV exposure, and temperature cycling. When you see cracking, separation, or chalking — reseal immediately. Don’t wait.
Use a self-leveling sealant like Dicor 501LSW for flat areas and a non-sag version for vertical surfaces. Clean the area thoroughly before applying and overlap the existing seal generously. A complete roof inspection and reseal takes two to three hours and costs under $100 in materials. The repair it prevents can cost more than your first camping trip.
Also check every window seal, exterior door gasket, and slide-out seal during the same inspection. Slide-out seals in particular are vulnerable — they’re compressed and released repeatedly with every trip and dry out faster than most owners expect.
Annual cost to prevent: $30–$80 in sealant Cost of ignoring it: $3,000–$15,000+
Problem #2: The Slide-Out That Won’t Cooperate
Why it happens: Slide-outs are the most mechanically complex feature of a modern travel trailer — and the most common source of after-hours campground panic. Whether it’s a slide that stops halfway out, refuses to retract before departure, or grinds ominously when it moves, slide-out failures have a way of happening at the least convenient possible moments.
Slide-outs fail for several reasons: dried-out seals that create excessive drag, debris in the slide track, worn gear mechanisms, electrical issues affecting the motor, and in some cases simple misalignment from road vibration over time.
The warning signs to watch for:
- Grinding or clicking sounds during extension or retraction
- Slow or hesitant movement where it used to move smoothly
- Visible gaps between the slide seal and the wall when fully extended
- Water stains around the slide frame interior — indicating the seal is no longer seating properly
- The slide stopping mid-travel without completing the movement
What to do: Lubricate the slide-out rails and gears every 3–6 months using a product specifically rated for slide-out mechanisms — not WD-40, which attracts dirt and dries out quickly. Lippert recommends their Slide-Out Lubricant or a dry PTFE spray for most mechanisms.
Inspect the slide-out wiper seals — the rubber seals that wipe the top of the slide as it moves — for cracking, tearing, or loss of flexibility. These need replacement when they show deterioration, typically every 3–5 years depending on climate and UV exposure.
If the slide stops mid-travel, check battery voltage first — most slide mechanisms require a healthy battery to complete the full movement cycle. A partially discharged battery is a surprisingly common cause of apparent slide failures that aren’t actually mechanical at all.
For manual override in an emergency: most slide-outs have a manual crank provision — find it in your owner’s manual before you need it at a campsite.
Problem #3: Wheel Bearing Failure
Why it’s serious: This one doesn’t just cost money. An unchecked wheel bearing failure at highway speed is genuinely dangerous — when a bearing fails catastrophically, the wheel can separate from the axle at speed. It’s rare when bearings are maintained properly. It’s not rare enough when they aren’t.
Travel trailer bearings endure significant stress — they carry the full weight of the trailer through road vibration, temperature extremes, and the occasional water crossing. Unlike automotive bearings, most travel trailer wheel bearings use a grease-packed system that requires periodic repacking rather than sealed lifetime units.
The warning signs to watch for:
- A humming or growling sound that increases with speed, coming from a wheel area
- Unusual heat when you touch the hub area after a drive (warm is normal; hot enough to be uncomfortable means problem)
- Wobbling or vibration from a specific wheel
- Pulling to one side while towing
What to do: Repack wheel bearings annually or every 12,000 miles — whichever comes first. If you frequently tow through water crossings, reduce that interval, because water displacement of bearing grease is a primary cause of premature bearing failure.
The process involves removing the wheel, disassembling the hub, cleaning old grease from bearings and races, inspecting for pitting or roughness, and repacking with fresh high-temperature wheel bearing grease before reassembly. Most independent RV service centers charge $75–$150 per axle for this service — one of the better maintenance investments in travel trailer ownership.
Install a TPMS (Tire Pressure Monitoring System) that also monitors hub temperature if your budget allows. EEZTire and PressurePro both make systems with temperature sensors that can alert you to a developing bearing problem before it becomes a catastrophic failure.
Problem #4: The Black Tank Sensor Is Lying to You
Why it happens: Ask any experienced travel trailer owner and they’ll tell you: the black tank sensor is one of the most reliably unreliable components on the entire trailer. Sensors that read “full” when the tank is empty, sensors that read “empty” when the tank is genuinely full, sensors that stopped reading entirely — these are almost universal complaints in the RV community.
The cause is simple: solid waste residue and toilet paper buildup coats the sensor probes over time, interfering with the capacitive measurement that tells the gauge what’s inside the tank. Once coated, the sensors give incorrect readings regardless of actual fill level.
What to do — and what actually works: Flush the black tank thoroughly after every dump — not just a quick rinse, but a sustained flush using the built-in tank rinser (if your trailer has one) or a dedicated tank rinser wand. Running a full tank of fresh water through before dumping helps break up buildup.
Use enzyme-based tank treatments like Unique Camping + Marine or Happy Campers at every dump cycle — these biologically break down waste and paper rather than just masking odors, which significantly reduces sensor coating over time.
For sensors that are already inaccurate: GEO Method — pour a few bags of ice and a cup of water softener (Calgon) down the toilet with a full tank of water, then drive. The sloshing cleans the sensor probes more effectively than most chemical treatments alone.
If sensors are completely failed: replace with a SeeLevel II tank monitoring system, which measures tank capacity externally through the tank wall rather than with internal probes — eliminating the coating problem entirely. Cost: $150–$250 installed.
The real lesson: Manage by schedule rather than by sensor. Know approximately how many days your tank runs at your household usage level and dump on schedule rather than trusting a sensor that may not be accurate.
Problem #5: Tire Blowout on the Highway
Why travel trailer tires are different: Travel trailer tires live a harder life than most people realize. They sit stationary for months at a time (during storage), then go from zero to highway speed in minutes — a thermal and mechanical shock cycle that accelerates deterioration. They carry significant weight. They can’t be easily monitored by the driver the way vehicle tires can.
Most travel trailer owners drastically underestimate how quickly RV tires age. A tire that looks fine — good tread, no visible cracking — can still be dangerously deteriorated internally if it’s past the five to seven year mark from its manufacture date (molded into the sidewall as a four-digit DOT code indicating week and year of manufacture).
The warning signs:
- Tires more than 5–7 years old regardless of appearance or mileage
- Visible cracking in the sidewall rubber, particularly in the tread grooves
- Flat spots from extended storage in one position
- Consistent pressure loss between trips
What to do: Check tire pressure before every trip — cold, at the manufacturer’s recommended PSI for your trailer’s loaded weight. Underinflated tires generate heat that is the primary cause of blowouts; excess heat is the enemy.
Replace tires at the 5–7 year mark based on manufacture date, not appearance. Tires that look fine can fail without warning past this age due to internal deterioration that isn’t visible externally.
Install a TPMS system. Basic units like TireMinder or EEZTire run $100–$200 and provide real-time pressure and temperature monitoring while towing — giving you warning before a pressure problem becomes a catastrophic blowout.
Use tire covers whenever the trailer is stored or parked for extended periods. UV radiation degrades rubber compounds rapidly; covers extend sidewall life significantly in sun-exposed storage.
Never exceed your trailer’s GVWR. Overloading is the second leading cause of blowouts after age — and the one most directly within owner control.
Problem #6: The Water Pump Runs But Nothing Comes Out
Why it happens: A water pump that runs continuously without delivering pressure is one of those problems that sounds simple and occasionally isn’t. The most common cause is a partially open or stuck bypass valve — easy to fix in two minutes. The second most common cause is a failed pump check valve or diaphragm. The least common — and most expensive — is a frozen and cracked water line discovered in spring after inadequate winterization.
Troubleshooting in order: First, confirm the fresh water tank actually has water in it — this sounds obvious and catches a surprising number of “malfunctions.”
Second, check that the water heater bypass valves are in the correct position — if the trailer was recently dewinterized, a valve in the wrong position can prevent pressurization.
Third, check for air leaks in the system — loose fittings or connections upstream of the pump prevent pressurization even when the pump runs correctly.
If none of those resolve it: replace the pump diaphragm or the pump itself. Shurflo 2088 pumps ($60–$80) are the standard replacement across most trailer brands and install in under an hour with basic tools.
Problem #7: Battery That Dies Every Weekend
Why it happens: The most common cause of a chronically underperforming trailer battery isn’t the battery itself — it’s a parasitic drain that slowly kills it between trips, combined with inadequate recharging from the tow vehicle during transport.
What’s actually draining it: Propane leak detectors, CO monitors, stereo memory, and in some cases the battery disconnect switch itself on older trailers all draw continuous small amounts of current — even when everything appears “off.” Over days or weeks of storage, these small draws discharge a battery that was never fully recharged after the last trip.
What to do: Invest in a battery maintainer or smart charger ($30–$80) and connect it during any storage period longer than two weeks. These devices maintain a full charge without overcharging — dramatically extending battery life and eliminating the dead battery surprise.
Upgrade to lithium if you boondock regularly. A 100Ah lithium battery delivers approximately 100Ah of usable power vs. roughly 50Ah from an equivalent AGM — and charges faster from solar, shore power, or the tow vehicle. The upgrade cost ($400–$800 for quality lithium) pays back in battery longevity and eliminated frustration.
Install a battery monitor like the Victron BMV-712 ($120) to see exactly what’s draining your battery and how much capacity remains — turning guesswork into data.
The Travel Trailer Owner’s Seasonal Maintenance Calendar
Before every trip:
- Tire pressure and visual inspection (tread, sidewall cracks, DOT date)
- Hitch ball, coupler, and safety chain inspection
- Brake controller function test
- All running lights working (brake lights, turn signals, running lights)
- Roof vent and window seal visual check
- Battery charge level
- Propane supply and hose condition
Every 3–6 months:
- Full roof and seal inspection and reseal where needed
- Slide-out lubrication and seal inspection
- Water pump operation check
- Smoke detector and CO detector battery test
- Interior plumbing inspection for drips or moisture
Annually:
- Wheel bearing repack (or every 12,000 miles)
- Full electrical system inspection
- LP system pressure test (by a certified technician)
- Appliance inspection — water heater anode rod, refrigerator seals
- Roof membrane cleaning and condition assessment
Before You Head Out Next Time
“Not all those who wander are lost.” — J.R.R. Tolkien
The travel trailer that gets you to the campsite reliably, year after year, isn’t the newest or the most expensive. It’s the one whose owner paid attention — who got on the roof in April, greased the slide rails in June, checked the bearings before the long summer haul, and dealt with the small things before they became the expensive things.
None of these maintenance tasks require professional expertise. Most require basic tools, an afternoon, and the knowledge of what to look for. That’s what this guide is for.
Your trailer is already trying to tell you what it needs. The question is whether you’re listening.
The Honest Bottom Line
“The road is there, it will always be there. You just have to decide when to take it.” — Jackson Browne
Preventive maintenance on a travel trailer costs $500–$1,500 per year done thoroughly. Emergency repairs for neglected systems routinely run $3,000–$15,000+. The math is not complicated.
The owners who have the best experiences with travel trailers — who camp for twenty years without a horror story — are overwhelmingly the ones who treat maintenance as part of the cost of the lifestyle rather than an annoying interruption to it.
Build the habits. Check the roof. Grease the slides. Watch the tires. Your trailer will reward you with years of reliable adventures.